Twitch Authentication
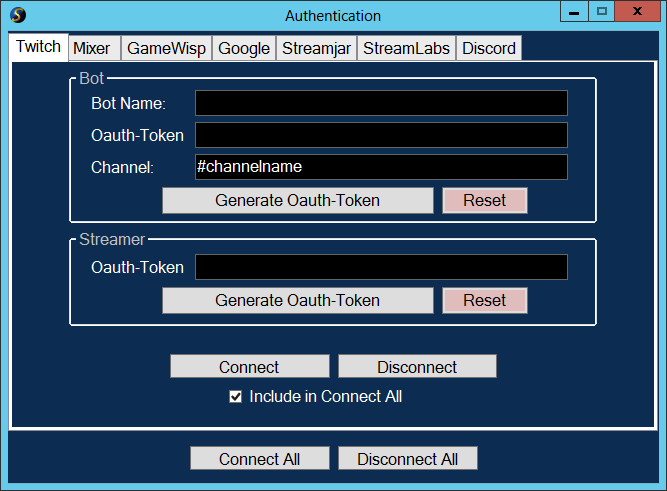
The Twitch Authentication dialog box is shown below. The proceeding steps will walk you through configuring this section.
Bot Account
Set the Bot Name
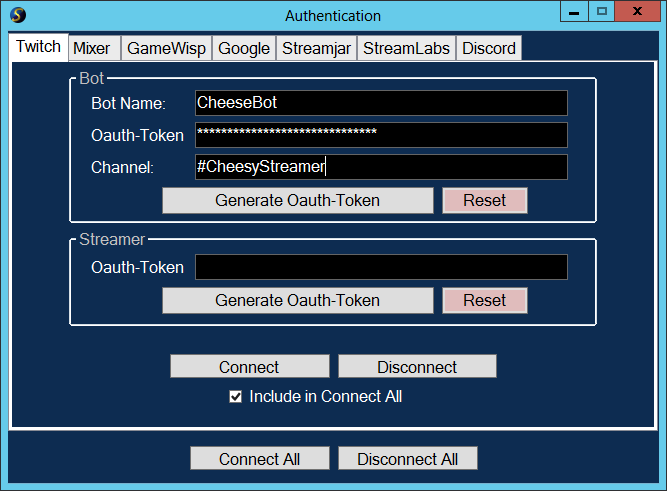
On the Twitch Authentication dialog box, you'll need to specify the name of the bot account. Fill this in.Example: If your bot account is named CheeseBot you'd enter that into this box.
Generate the OAuth Token
An OAuth Token is a secure method for allowing applications to access your account without providing the username or password. This protects your account as it is easily revoked and usually cannot modify your core account info (email, username, password, etc.).
To get your OAuth token, click the Generate Oauth-Token button at the bottom of the dialog. You will receive a message along these lines:
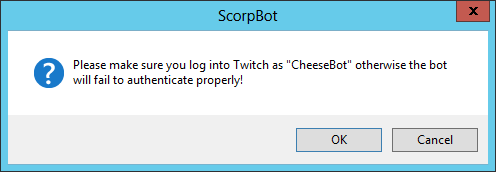
Clicking Okay will redirect you to the Twitch Authentication page in your web browser. Be sure you're authenticated with the right account
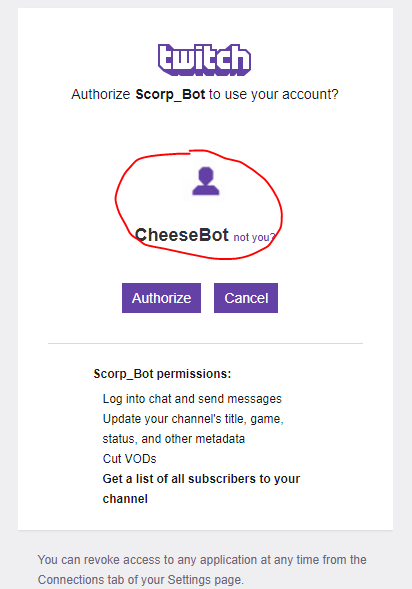
Upon hitting "Authorize," you'll be redirected to the ScorpBot website (scorpware.ca) with your OAuth Token visible on the screen. Copy the token and paste it into the appropriate field in the Twitch Authentication dialog box.

Set the channel in which it resides
Twitch's core chat technology is based off IRC, a very old and very reliable technology. Because of this, the chat channel the bot resides in must be indicated. Channels are based off usernames, preceded by a # sign.
So, if your username is CheesyStreamer, you'd put #CheesyStreamer in the Channel box.